Category: Technical SEO

  • How to create a Sitemap for Google Search Console

    How to create a Sitemap for Google Search Console

    What is a Sitemap?

    A sitemap is an XML, RSS, or text file that outlines the structure of your website by listing the URLs of all the individual pages. It acts as a roadmap for search engines, allowing them to quickly find and index all the important content on your site.

    This is particularly crucial for large websites with numerous pages that might not be discoverable via regular browsing.

    A sitemap can also include metadata about each URL, such as when it was last updated, how often it changes, and its importance relative to other pages, which helps search engines crawl your site more intelligently.

    Types of Content in a Sitemap

    Video Content

    For video content, a sitemap can include specific tags such as <video:video> which encase further details like <video:title>, <video:description>, and <video:duration>.

    For example, a video sitemap entry might look like this:

    <video:video>
      <video:content_loc>http://www.example.com/video123.flv</video:content_loc>
      <video:title>How to install a solar panel</video:title>
      <video:description>This video demonstrates the step-by-step solar panel installation</video:description>
      <video:duration>600</video:duration>
      <video:rating>4.5</video:rating>
    </video:video>

    This detailed structuring helps search engines understand and appropriately index and present video content in search results, potentially increasing the reach and views of the content.

    Image Content

    An image sitemap might include location, caption, title, and license information. For instance:

    <image:image>
      <image:loc>http://www.example.com/image.jpg</image:loc>
      <image:caption>Solar eclipse as seen from the park</image:caption>
      <image:title>Solar Eclipse</image:title>
      <image:license>http://www.example.com/license</image:license>
    </image:image>
    

    News Content

    A news sitemap is pivotal for websites publishing timely content. It helps news articles appear more prominently in search engine news sections, potentially driving higher traffic during peak interest times. An example entry would be:

    <news:news>
      <news:publication>
        <news:name>Example Daily</news:name>
        <news:language>en</news:language>
      </news:publication>
      <news:publication_date>2025-02-10</news:publication_date>
      <news:title>Local Elections 2025: Key Takeaways</news:title>
    </news:news>

    If you’re using a content management system (CMS) like WordPress, Wix, or Blogger, it’s likely your CMS has already created a sitemap for you, so you might not need to take further action.

    How to Create an XML Sitemap

    Creating an XML sitemap might sound technical, but it’s easier than you think. Here are a few methods to create one:

    1. Use a Sitemap Generator Tool

    There are plenty of free and paid tools online that can automatically generate a sitemap for you. Some popular options include:

    • XML-Sitemaps.com: A free tool for smaller sites (up to 500 pages).
    • Screaming Frog SEO Spider: A desktop tool for larger sites (free for up to 500 URLs).
    • Yoast SEO (for WordPress): If you’re using WordPress, the Yoast plugin can automatically generate and update your sitemap.

    2. Manually Create a Sitemap

    If you’re comfortable with coding, you can create a sitemap manually. Here’s a basic example of what an XML sitemap looks like:

    <?xml version="1.0" encoding="UTF-8"?>
    <urlset xmlns="http://www.sitemaps.org/schemas/sitemap/0.9">
       <url>
          <loc>https://www.example.com/</loc>
          <lastmod>2023-10-01</lastmod>
          <changefreq>weekly</changefreq>
          <priority>1.0</priority>
       </url>
       <url>
          <loc>https://www.example.com/about</loc>
          <lastmod>2023-09-15</lastmod>
          <changefreq>monthly</changefreq>
          <priority>0.8</priority>
       </url>
    </urlset>

    Where:

    • <loc>: The URL of the page.
    • <lastmod>: The date the page was last modified.
    • <changefreq>: How often the page is updated (e.g., daily, weekly, monthly).
    • <priority>: The importance of the page relative to other pages on your site (ranges from 0.0 to 1.0).

    3. Use Your CMS or Website Builder

    Many content management systems (CMS) like WordPress, Wix, and Shopify automatically generate sitemaps for you. For example:

    • WordPress: If you’re using Yoast SEO or Rank Math, your sitemap is usually located at https://yourwebsite.com/sitemap_index.xml.
    • Wix: Your sitemap is automatically created and can be found at https://yourwebsite.com/sitemap.xml.
    • Shopify: Your sitemap is located at https://yourstore.com/sitemap.xml.

    Do I Need a Sitemap?

    When You Might Need a Sitemap

    • Large Sites: It’s harder to ensure every page is linked on a large site, making a sitemap beneficial.
    • New Sites: New sites with few external links might not be discovered by Googlebot.
    • Rich Media Content: Sites with a lot of videos, images, or news content benefit from a sitemap as Google can take additional information into account for Search.

    When You Might Not Need a Sitemap

    • Small Sites: If your site has about 500 pages or fewer, and all pages are properly linked, you might not need a sitemap.
    • Comprehensively Linked Sites: If Googlebot can find all important pages by following links from the homepage.
    • Minimal Media Content: If you don’t have many media files or news pages you want to show in search results.

    Here’s an in depth case study on why you still need a sitemap even if your website falls under “When You Might Not Need a Sitemap”.

    Building a Sitemap

    Choosing the Right Format

    Google supports several sitemap formats, each with its own benefits and drawbacks:

    1. XML Sitemaps: The most versatile, can provide extensive information about your URLs.
      • Pros: Extensible, versatile, widely supported by CMS plugins.
      • Cons: Can be complex to maintain, especially for large sites.
    2. RSS, mRSS, and Atom 1.0: Easy to create, particularly for video content.
      • Pros: Automatically generated by most CMS.
      • Cons: Limited to videos, cannot provide information about images or news.
    3. Text Sitemaps: Simple format, lists URLs to HTML and other indexable pages.
      • Pros: Easy to create and maintain.
      • Cons: Limited to HTML content.

    Best Practices for Sitemaps

    • Size Limits: A single sitemap should be no larger than 50MB (uncompressed) and contain no more than 50,000 URLs. If necessary, break it into multiple sitemaps and use a sitemap index file.
    • Encoding and Location: The sitemap file must be UTF-8 encoded and can be hosted anywhere on your site. However, it should preferably be at the site root to affect all files.
    • URLs: Use fully-qualified, absolute URLs in your sitemaps. For instance, use https://www.example.com/mypage.html instead of /mypage.html.

    How to create a Sitemap for Google Search Console

    1. CMS-Generated Sitemaps: Most CMS like WordPress, Wix, and Blogger automatically generate sitemaps. Check your CMS documentation for details.
    2. Manual Creation: For small sites, you can create a sitemap manually using a text editor.
    3. Automatic Generation: For larger sites, use tools or plugins to generate sitemaps. Talk to your developers about creating scripts to extract URLs from your database.

    Example of a Basic XML Sitemap

    <?xml version="1.0" encoding="UTF-8"?>
    <urlset xmlns="http://www.sitemaps.org/schemas/sitemap/0.9">
      <url>
        <loc>https://www.example.com/foo.html</loc>
        <lastmod>2022-06-04</lastmod>
      </url>
    </urlset>
    

    Generating Sitemap for Different CMS

    If you’re using a content management system (CMS) like Wix, Squarespace, or Magento, you’re in luck! These platforms make it relatively easy to generate and manage sitemaps, even if you’re not a tech expert. Below, we’ll dive into the specifics of how to generate and submit a sitemap for each of these popular CMS platforms.

    • WordPress
    • Squarespace
    • Wix
    • Magento
    • Drupal
    • Shopify

    Generating a Sitemap on Squarespace

    Squarespace is known for its user-friendly interface and seamless integration of essential SEO tools, including automatic sitemap generation. Here’s how to access and submit your sitemap:

    Step 1: Find Your Sitemap URL

    1. Log in to Your Squarespace Account: Go to your Squarespace dashboard and select the website you’re working on.
    2. Locate Your Sitemap: Squarespace automatically generates a sitemap for your site. The URL typically follows this format: https://yourwebsite.com/sitemap.xml.
      • For example, if your site is www.myblog.com, your sitemap will be www.myblog.com/sitemap.xml.
    3. Verify Your Sitemap: You can check if your sitemap is working by entering the URL into your browser. It should display a list of your site’s URLs in XML format.

    Step 2: Submit Your Sitemap to Google

    1. Go to Google Search Console: Log in to your Google Search Console account and select the property (website) you want to submit the sitemap for.
    2. Navigate to the Sitemaps Section: In the left-hand menu, click on “Sitemaps” under the “Index” section.
    3. Submit Your Sitemap: In the “Add a new sitemap” field, enter sitemap.xml and click “Submit”.
    4. Monitor the Status: Google will start processing your sitemap. You can check the status in the Search Console to ensure there are no errors.

    Pro Tip: Squarespace automatically updates your sitemap whenever you add or remove pages, so you don’t need to worry about manually updating it.

    Generating a Sitemap on Wix

    Wix is another beginner-friendly platform that takes care of sitemap generation for you. Here’s how to access and submit your sitemap:

    Step 1: Find Your Sitemap URL

    1. Log in to Your Wix Account: Access your Wix dashboard and select the site you’re working on.
    2. Locate Your Sitemap: Wix automatically generates a sitemap for your site. The URL will look like this: https://yourwebsite.com/sitemap.xml.
      • For example, if your site is www.mystore.com, your sitemap will be www.mystore.com/sitemap.xml.
    3. Verify Your Sitemap: Enter the sitemap URL into your browser to confirm it’s working. You should see an XML file listing your site’s URLs.

    Step 2: Submit Your Sitemap to Google

    1. Go to Google Search Console: Log in to your Google Search Console account and select the relevant property.
    2. Navigate to the Sitemaps Section: Click on “Sitemaps” in the left-hand menu.
    3. Submit Your Sitemap: Enter sitemap.xml in the “Add a new sitemap” field and click “Submit”.
    4. Monitor the Status: Keep an eye on the status in Google Search Console to ensure everything is processed correctly.

    Pro Tip: Wix automatically updates your sitemap whenever you make changes to your site, so you don’t need to manually regenerate it.

    Generating a Sitemap on Magento

    Magento is a more advanced CMS, often used for e-commerce websites. While it requires a bit more technical know-how, generating and submitting a sitemap is still straightforward. Here’s how to do it:

    Step 1: Generate Your Sitemap in Magento

    1. Log in to Your Magento Admin Panel: Access the backend of your Magento site.
    2. Navigate to the Sitemap Section: Go to Marketing > Site Map.
    3. Create a New Sitemap:
      • Click Add Sitemap.
      • Fill in the required fields, such as the filename (e.g., sitemap.xml) and path.
      • Set the frequency and priority for your pages. For example:
        • Blog posts: Set to daily.
        • Product pages: Set to weekly.
        • Static pages (e.g., About Us): Set to monthly.
      • Click Save & Generate to create your sitemap.
    4. Verify Your Sitemap: Once generated, your sitemap URL will look something like this: https://yourwebsite.com/sitemap.xml. You can check it by entering the URL into your browser.

    Step 2: Submit Your Sitemap to Google

    1. Go to Google Search Console: Log in to your Google Search Console account and select the relevant property.
    2. Navigate to the Sitemaps Section: Click on “Sitemaps” in the left-hand menu.
    3. Submit Your Sitemap: Enter sitemap.xml in the “Add a new sitemap” field and click “Submit”.
    4. Monitor the Status: Check the status in Google Search Console to ensure there are no errors.

    Pro Tip: Magento allows you to schedule sitemap generation, so you can set it to update automatically at regular intervals (e.g., daily or weekly). This is especially useful for e-commerce sites with frequently changing inventory.

    Generating a Sitemap on Drupal

    Drupal is a powerful and flexible CMS, often used for complex websites. While it doesn’t generate sitemaps automatically out of the box, you can easily add this functionality using modules. Here’s how to do it:

    Step 1: Install the XML Sitemap Module

    1. Log in to Your Drupal Admin Panel: Access the backend of your Drupal site.
    2. Download and Install the Module:
      • Go to the Extend section in the admin menu.
      • Search for the XML Sitemap module (or use the Simple XML Sitemap module for Drupal 8/9/10).
      • Download and install the module.
    3. Enable the Module: Once installed, enable the module by checking the box next to it and clicking Install.

    Step 2: Configure the XML Sitemap Module

    1. Navigate to the Configuration Page: Go to Configuration > Search and Metadata > XML Sitemap.
    2. Set Up Your Sitemap:
      • Configure the settings for your sitemap, such as which content types, taxonomies, and custom links to include.
      • Set the update frequency and priority for different types of content (e.g., blog posts, product pages).
    3. Generate Your Sitemap: Click Save Configuration to generate your sitemap.

    Step 3: Find Your Sitemap URL

    1. Locate Your Sitemap: Once generated, your sitemap URL will typically look like this: https://yourwebsite.com/sitemap.xml.
    2. Verify Your Sitemap: Enter the URL into your browser to confirm it’s working. You should see an XML file listing your site’s URLs.

    Step 4: Submit Your Sitemap to Google

    1. Go to Google Search Console: Log in to your Google Search Console account and select the relevant property.
    2. Navigate to the Sitemaps Section: Click on “Sitemaps” in the left-hand menu.
    3. Submit Your Sitemap: Enter sitemap.xml in the “Add a new sitemap” field and click “Submit”.
    4. Monitor the Status: Check the status in Google Search Console to ensure there are no errors.

    Pro Tip: The XML Sitemap module allows you to schedule automatic updates, so your sitemap stays current without manual intervention.

    Generating and Submitting a Sitemap on Shopify

    Shopify is a popular e-commerce platform that simplifies sitemap generation for online stores. Here’s how to access and submit your sitemap:

    Step 1: Find Your Sitemap URL

    1. Log in to Your Shopify Admin Panel: Access the backend of your Shopify store.
    2. Locate Your Sitemap: Shopify automatically generates a sitemap for your store. The URL will look like this: https://yourstore.com/sitemap.xml.
      • For example, if your store is www.myshop.com, your sitemap will be www.myshop.com/sitemap.xml.
    3. Verify Your Sitemap: Enter the sitemap URL into your browser to confirm it’s working. You should see an XML file listing your store’s URLs.

    Step 2: Submit Your Sitemap to Google

    1. Go to Google Search Console: Log in to your Google Search Console account and select the relevant property.
    2. Navigate to the Sitemaps Section: Click on “Sitemaps” in the left-hand menu.
    3. Submit Your Sitemap: Enter sitemap.xml in the “Add a new sitemap” field and click “Submit”.
    4. Monitor the Status: Keep an eye on the status in Google Search Console to ensure everything is processed correctly.

    Pro Tip: Shopify automatically updates your sitemap whenever you add or remove products, collections, or pages, so you don’t need to manually regenerate it.

    Key Takeaways for Each CMS

    • Squarespace: Fully automated sitemap generation. Just submit sitemap.xml to Google Search Console, and Squarespace handles the rest.
    • Wix: Also fully automated. Your sitemap is always up-to-date, and you only need to submit sitemap.xml to Google.
    • Magento: Requires manual setup but offers advanced customization options, such as setting update frequencies and priorities. Ideal for large e-commerce sites.
    • Drupal: Requires the installation of a module (e.g., XML Sitemap or Simple XML Sitemap) but offers advanced customization options for large or complex sites.
    • Shopify: Fully automated sitemap generation. Just submit sitemap.xml to Google Search Console, and Shopify handles the rest.

    Why Sitemaps Matter for These CMS Platforms

    Regardless of which CMS you’re using, a sitemap is a crucial tool for ensuring your site is fully indexed by Google. Here’s why it’s especially important for these platforms:

    Media-Rich Sites (Wix, Squarespace): Ensures images, videos, and other media are properly indexed for rich search results.

    E-commerce Sites (Magento): With thousands of product pages, a sitemap ensures nothing gets missed.

    Blogs and Portfolios (Squarespace, Wix): Helps Google index new posts or projects quickly.

    Drupal:

    • Complex Sites: Drupal is often used for large, complex websites with thousands of pages. A sitemap ensures that all pages are discoverable by search engines.
    • Custom Content Types: Drupal’s flexibility allows for custom content types, which can be included in the sitemap for better indexing.

    Shopify:

    E-commerce Sites: With constantly changing inventory, a sitemap ensures that new products and collections are indexed quickly.

    SEO for Product Pages: A sitemap helps Google find and rank individual product pages, which is crucial for driving traffic to your store.

    Whether you’re using Squarespace, Wix, or Magento, generating and submitting a sitemap is a simple yet powerful way to improve your site’s visibility in search results. Each platform has its own unique process, but the end goal is the same: to make it as easy as possible for Google to find and index your content.

    So, take a few minutes to locate your sitemap, submit it to Google Search Console, and enjoy the peace of mind that comes with knowing your site is fully optimized for search engines.

    Submitting Your Sitemap to Google

    Submitting a sitemap helps Google find your URLs, but it doesn’t guarantee all will be crawled. Here’s how to submit your sitemap:

    1. Search Console: Use the Sitemaps report to submit your sitemap URL.
    2. API: Programmatically submit your sitemap using the Search Console API.
    3. robots.txt: Add a line in your robots.txt file specifying the path to your sitemap, e.g., Sitemap: https://example.com/my_sitemap.xml.

    Troubleshooting Sitemaps on Google Search Console

    Use Google Search Console to manage and troubleshoot sitemaps. The Sitemaps report provides details on submission history and any errors encountered. Here are common issues and solutions:

    • Fetch Errors: Ensure the sitemap URL is correct and accessible. Check for robots.txt restrictions or manual actions.
    • Parsing Errors: Ensure your sitemap follows the correct format and syntax.
    • Size Issues: If your sitemap is too large, break it into smaller sitemaps.

    Having a sitemap is crucial for SEO, but ensuring it’s functioning correctly is equally important. Google Search Console provides various tools and reports to help you troubleshoot any issues with your sitemap. Here’s a detailed guide on how to troubleshoot sitemaps using Google Search Console.

    Accessing the Sitemaps Report

    To get started with troubleshooting your sitemap, follow these steps:

    1. Log into Google Search Console: Use your Google account to access your Search Console dashboard.
    2. Navigate to the Sitemaps Report: On the left-hand menu, click on “Sitemaps” under the “Index” section. This will display all the sitemaps you have submitted.

    Common Sitemap Issues and How to Fix Them

    If you manage a website, you know how crucial sitemaps are for SEO. They guide search engines through your site’s content, ensuring that all your pages get indexed properly. However, issues can arise that prevent sitemaps from functioning correctly. Here’s an in-depth look at some common sitemap problems and how to fix them.

    1. Couldn’t Fetch Sitemap

    Google can’t retrieve the sitemap file from your server, leading to this error.

    Common Causes:

    • The sitemap URL may be incorrect.
    • Your robots.txt file might be blocking access to the sitemap.
    • Manual actions or security measures could be restricting Google’s access.
    • Potential server issues like downtime or misconfigurations.

    Solutions:

    • Verify Sitemap URL: Make sure that the URL provided in the Google Search Console is correct and leads directly to the sitemap file. Test the URL in a web browser to ensure it downloads the sitemap.
    • Check robots.txt: Open your robots.txt file and ensure there are no Disallow: entries blocking the sitemap URL. If necessary, add Allow: /sitemap_location to explicitly allow access.
    • Resolve Manual Actions: In Google Search Console, navigate to the ‘Security & Manual Actions’ section to see if there are any penalties affecting your site’s access. Follow Google’s guidelines to resolve these issues.
    • Server Configuration: Ensure your web server is properly configured to serve the sitemap. Check server logs for any errors and make sure the server is running with adequate uptime.

    2. Sitemap Parsing Errors

    Google encountered errors trying to read the sitemap.

    Common Causes:

    • Errors in XML syntax within the sitemap file.
    • Unescaped characters disrupting XML parsing.

    Solutions:

    • XML Validation: Use online tools like the XML Sitemap Validator to check for syntax errors. This will highlight issues like unclosed tags, missing quotes, or illegal characters.
    • Character Escaping: Ensure that characters like ampersands (&), quotes (‘ or “), and less than (<) or greater than (>) symbols are properly escaped in the XML. For example, use &amp; for an ampersand.

    3. URLs Not Accessible

    Google cannot crawl one or more URLs listed in your sitemap.

    Common Causes:

    • URLs are blocked by robots.txt.
    • URLs that lead to 404 errors or unintended redirects.
    • Server errors when accessing URLs.

    Solutions:

    • URL Inspection Tool: Use Google Search Console’s URL Inspection tool to test specific URLs reported as not accessible. This tool provides details on why a URL might be blocked or not indexed.
    • Adjust robots.txt: If URLs are blocked, modify your robots.txt to remove any Disallow: entries for those URLs or use more specific rules.
    • Fix 404 and Redirects: Identify URLs that result in 404 errors using tools like Screaming Frog SEO Spider to crawl your site. Replace or remove invalid URLs. Ensure that redirects are intentional and use 301 (permanent) redirects when appropriate.
    • Server Health Check: Monitor your server’s health and logs to identify and resolve errors that prevent URL accessibility. Check for 5xx server errors and resolve them with your hosting provider if necessary.

    4. Sitemap File Size Error

    The sitemap exceeds Google’s maximum file size limit of 50MB (uncompressed) or contains more than 50,000 URLs.

    Solutions:

    • Split Sitemap: Divide your sitemap into multiple smaller files. For instance, create separate sitemaps for different categories or content types on your site.
    • Create Sitemap Index: Once split, list all individual sitemaps in a single sitemap index file. This index acts like a sitemap of sitemaps, making it easier for Google to crawl and manage.

    5. Invalid Date

    There are incorrectly formatted dates within the sitemap.

    Solution:

    • Correct Date Format: Verify that all date entries in your sitemap follow the W3C Datetime format. Tools like date and time validators can ensure your timestamps are compliant.
    • Automate Date Handling: Implement automated scripts or CMS plugins that format dates correctly when the sitemap is generated, reducing manual errors.

    6. Compression Errors

    Issues occur when Google tries to decompress the sitemap.

    Solutions:

    • Proper Compression: Use gzip to compress your sitemap files reliably. Make sure to select a compatible compression level that Google can decompress.
    • Testing Compression: After compressing, always test by decompressing the file yourself to ensure no data corruption has occurred.
    • Resubmission: Once tested and confirmed, upload the new gzip file to your server and resubmit it via Google Search Console.

    7. Missing Tags or Attributes

    Your sitemap lacks required XML tags or attributes.

    Solutions:

    • Review Sitemap Schema: Regularly check your sitemap against the latest XML sitemap schema guidelines available from sitemaps.org or other authoritative sources.Update Sitemap: Use tools or scripts that automatically add necessary tags and attributes when generating the sitemap. This minimizes the risk of human error.

    8. Too Many URLs

    The sitemap lists more URLs than Google’s limit of 50,000.

    Solutions:

    • Sitemap Segmentation: Organize your content and create separate sitemaps for each segment. For example, separate sitemaps for blog posts, product pages, and static pages.
    • Implement Sitemap Index: Use a sitemap index file to keep track of all segmented sitemaps, simplifying management and submission to search engines.

    By understanding these common sitemap issues and implementing the suggested solutions, you can enhance your site’s visibility and performance in search engine results. Regularly checking and maintaining your sitemap ensures that your site remains easy for search engines to navigate and index.

    Using the URL Inspection Tool

    The URL Inspection tool in Google Search Console allows you to see how Google views a specific URL. Here’s how to use it:

    1. Enter the URL: In the URL Inspection tool, input the URL you want to check and press Enter.
    2. Check for Issues: The tool will display various details about the URL, including whether it’s indexed, any errors encountered, and the page’s status.
    3. Live Test: Click on “Live Test” to see the real-time status of the URL. This helps identify current issues affecting Google’s ability to crawl the URL.

    Reviewing and Fixing Errors

    To fix errors in your sitemap:

    1. Click on the Sitemap: In the Sitemaps report, click on the sitemap with errors.
    2. View Details: You’ll see a detailed page listing all errors and warnings.
    3. Expand Errors: Click on each error to expand and see more details.
    4. Fix Issues: Based on the error details, take appropriate actions to fix the issues. This might involve editing the sitemap, fixing server errors, or addressing robots.txt blocks.
    5. Resubmit Sitemap: After making corrections, resubmit the sitemap via the Sitemaps report.

    Monitoring Sitemap Performance

    Regularly monitor your sitemap performance using the Sitemaps report. Check back periodically to ensure Google is fetching and processing your sitemaps correctly. Address any new issues promptly to maintain your site’s SEO health.

    Troubleshooting sitemaps is an essential part of SEO maintenance. By using Google Search Console effectively, you can identify and fix issues that might hinder your site’s performance in search results. Regular monitoring and timely adjustments ensure that your content remains accessible and well-indexed by search engines, leading to better visibility and traffic. Happy optimizing!

    Cross-Submitting Sitemaps

    If you manage multiple sites, you can simplify submission by creating sitemaps that include URLs from all your sites and saving them in a single location. Use Search Console or robots.txt to submit these cross-site sitemaps.

    Maintaining and Updating Your Sitemap

    Regularly update your sitemap to reflect changes on your site. If you make significant updates, resubmit your sitemap to Google. For minor changes, Google will recrawl your sitemap periodically.

    Wrapping Up

    A well-structured sitemap can significantly enhance your site’s visibility on search engines, making it easier for users to find your content. Whether you’re managing a small blog or a large e-commerce site, following these guidelines will help ensure your content is efficiently crawled and indexed.

    By taking the time to understand and implement effective sitemap practices, you’re setting the foundation for better SEO and a more successful website.

    If you encounter any issues, refer to the Google Search Console documentation for further guidance. Happy optimizing!

  • SEO Guide for Beginners

    SEO Guide for Beginners

    When you first built your website, you probably had a vision in mind: a place where visitors could easily find and explore your content. Maybe you wanted to share your passion, grow your business, or connect with like-minded people.

    But here’s the thing—your website isn’t just for human visitors. There’s another important “visitor” to consider: search engines. These digital explorers help people discover your site by indexing your content and displaying it in search results.

    That’s where SEO, or Search Engine Optimization, comes in. SEO is all about helping search engines understand your content so that users can find your site and decide to click through to it.

    In this guide, we’ll walk through the basics of SEO in a way that’s personal, relatable, and easy to understand. Whether you’re running a blog, an online store, or a portfolio site, these tips will help you improve your site’s visibility and make it easier for people to find you.

    Understanding How Google Search Works

    Let’s start with the basics. Google uses automated programs called crawlers (or spiders) to explore the web. Think of these crawlers as tiny robots that scan websites, follow links, and add pages to Google’s massive index. The good news? You don’t need to do much to get started. Simply publishing your site online is usually enough for Google to find it.

    But if you’re like me and love to geek out on the details, Google provides extensive documentation on how it discovers, crawls, and serves web pages. Understanding this process can help you fine-tune your site for better visibility. For example, knowing how crawlers work can help you avoid common mistakes, like blocking important pages accidentally.

    Be Patient with Search Results

    Here’s something I’ve learned the hard way: SEO is a marathon, not a sprint. When you make changes to your site, don’t expect instant results. It can take anywhere from a few hours to several months for Google to reflect those updates in its search results. Typically, you’ll want to wait a few weeks to see if your efforts are paying off.

    I remember updating a blog post with new keywords and checking Google every day, wondering why nothing had changed. It was frustrating at first, but eventually, I saw a steady increase in traffic. The key is to be patient and persistent. Not every change will lead to a noticeable improvement, but over time, those small tweaks can add up.

    Helping Google Find Your Content

    1. Check if Google Has Already Found Your Site

    Before diving into complex SEO strategies, it’s important to know if Google has even found your site. You can do this by using the site: search operator. For example, type site:yourwebsite.com into Google. If results appear, your site is in Google’s index. If not, there may be technical issues preventing Google from crawling your site.

    2. Leverage Links

    Google primarily discovers new pages by following links from sites it already knows. This means that getting other websites to link to yours is incredibly valuable. Over time, you can encourage this naturally by creating high-quality content that others want to share. You can also promote your content through social media, blogs, or guest posts to increase its visibility.

    3. Submit a Sitemap

    A sitemap is a file that lists all the URLs on your site. While not mandatory, submitting one can help Google discover your pages more efficiently. Many content management systems (CMS) like WordPress can generate and submit sitemaps automatically. It’s like giving Google a map of your site, making it easier for crawlers to navigate.

    Ensuring Google Sees Your Page Like Users Do

    Google needs to access the same resources (like CSS, JavaScript, and images) that users see. If your site hides important components, Google might not fully understand your pages, which could hurt your rankings. To check how Google views your page, use the URL Inspection Tool in Google Search Console. This tool gives you a detailed look at how Googlebot interacts with your site.

    I once made the mistake of blocking CSS files accidentally, and my site’s rankings dropped overnight. It was a wake-up call to double-check how Google was seeing my pages. The URL Inspection Tool helped me identify and fix the issue quickly.

    Controlling What Appears in Search Results

    When it comes to SEO, one of the most common misconceptions is that you have complete control over what appears in search results. The truth is, while you can optimize your site and guide search engines like Google, you can’t fully dictate how or when your content will show up. Google’s algorithms are complex and constantly evolving, which means there’s always an element of unpredictability. However, you can take steps to influence what gets indexed and how your site is represented in search results.

    Not Every Page Needs to Be in Search Results

    Let’s be honest—not every page on your site is meant for public consumption. Maybe you have personal blog posts, internal admin pages, or draft content that you don’t want showing up in search results. That’s perfectly okay! In fact, it’s a good practice to keep irrelevant or sensitive pages out of Google’s index. This not only protects your privacy but also ensures that users are directed to the most relevant and useful parts of your site.

    Tools to Control Indexing

    Google provides a few tools to help you manage what gets indexed:

    1. robots.txt:
      This is a file you can place on your server to tell search engine crawlers which pages or sections of your site they should or shouldn’t access. For example, if you have a private section of your site, you can block crawlers from accessing it. However, keep in mind that robots.txt is more of a suggestion than a hard rule—some crawlers might ignore it.
    2. Noindex Tags:
      If you want to prevent specific pages from appearing in search results, you can add a noindex meta tag to the page’s HTML. This tells Google not to include the page in its index. It’s a more direct way to control indexing compared to robots.txt.
    3. Password Protection:
      For highly sensitive content, you can password-protect pages. This ensures that only authorized users can access them, and search engines won’t even try to index them.

    Realistically, You Can’t Control Everything

    Here’s the reality: even with these tools, you can’t fully control what appears in search results. Google’s algorithms make the final call, and sometimes they might interpret your site differently than you intended. For example, you might optimize a page for a specific keyword, but Google might decide that another page on your site is more relevant for that search term. Or, you might accidentally block an important page with robots.txt without realizing it.

    The key is to focus on what you can control. Optimize your site as best as you can, use tools like robots.txt and noindex tags wisely, and regularly monitor your site’s performance in Google Search Console. If something doesn’t look right, you can make adjustments and see how Google responds.

    What If Something Slips Through?

    Sometimes, despite your best efforts, a page you didn’t want indexed might still appear in search results. If this happens, don’t panic. You can:

    • Double-check your robots.txt file and noindex tags to ensure they’re set up correctly.
    • Use the Removal Tool in Google Search Console to request that a specific URL be removed from search results temporarily.
    • Reach out to Google’s support forums or help documentation for guidance.

    The Bigger Picture

    At the end of the day, SEO is about working with search engines, not against them. While you can’t control every aspect of how your site appears in search results, you can create a clear, well-structured site that makes it easy for Google to understand your content. Think of it as a partnership: you provide the best possible version of your site, and Google does its best to match it with the right users.

    So, while you might not have full control, you do have the power to influence the process. Focus on optimizing your site, monitoring its performance, and making adjustments as needed. Over time, you’ll see improvements in how your site is represented in search results—and that’s what really matters.

    Organizing Your Site for Better SEO: A Roadmap to Clarity and Efficiency

    When it comes to SEO, the way you organize your website is just as important as the content you create. A well-structured site not only helps users navigate effortlessly but also makes it easier for search engines to understand and index your content. Think of your website as a library—if the books are scattered randomly, no one can find what they’re looking for. But if everything is neatly categorized and labeled, both visitors and search engines can quickly locate the information they need.

    Here’s a detailed guide to organizing your site for better SEO, with practical tips and relatable examples to help you get started.


    1. Use Descriptive URLs

    Why Descriptive URLs Matter

    Imagine you’re searching for a recipe online. Which URL would you trust more:

    • www.example.com/recipes/vegan-chocolate-cake
    • www.example.com/page123?id=4567

    The first one, right? Descriptive URLs are like signposts—they tell users and search engines exactly what to expect on the page. They’re also easier to share and remember, which can improve click-through rates.

    How to Create Descriptive URLs

    • Keep it simple and relevant: Use words that clearly describe the page’s content. For example, if you’re writing about travel tips for Italy, a URL like www.example.com/travel/italy-tips is far better than www.example.com/category1/post123.
    • Use hyphens to separate words: Avoid underscores or spaces. For example, www.example.com/digital-marketing-tips is better than www.example.com/digitalmarketingtips.
    • Avoid unnecessary parameters: Long strings of numbers or symbols can confuse both users and search engines. Stick to clean, readable URLs.

    A Personal Tip

    When I first started my blog, I didn’t pay much attention to URLs. I let my CMS generate them automatically, which resulted in messy, uninformative links. Once I switched to descriptive URLs, I noticed a small but steady increase in traffic. It’s a simple change, but it makes a big difference.


    2. Group Similar Pages

    Why Grouping Pages is Important

    Grouping related pages into directories (or folders) helps both users and search engines understand the structure of your site. It’s like organizing your closet—you wouldn’t mix socks with winter coats, right? The same logic applies to your website.

    How to Group Pages Effectively

    • Create logical categories: Think about the main topics or services your site covers. For example, if you run an online store, you might have categories like www.example.com/shoeswww.example.com/accessories, and www.example.com/sale.
    • Use subcategories for deeper organization: If you have a lot of content, break it down further. For instance, www.example.com/shoes/sneakers and www.example.com/shoes/boots make it easier for users to find what they’re looking for.
    • Keep it user-friendly: Don’t create too many layers of subcategories. If users have to click through five levels to find a page, they might give up.

    How This Helps SEO:
    Grouping pages helps Google understand the relationships between your content. For example, if you have a blog post about “10 Best Running Shoes” in your www.example.com/shoes directory, Google will recognize that it’s related to other shoe-related content. This can improve your site’s overall relevance for specific topics.


    3. Reduce Duplicate Content

    Why Duplicate Content is a Problem

    Duplicate content occurs when the same (or very similar) content appears on multiple URLs. This can confuse users and search engines, as they don’t know which version to prioritize. It can also dilute your SEO efforts, as search engines may split ranking signals between the duplicates.

    Common Causes of Duplicate Content

    • URL variations: For example, www.example.com/page and www.example.com/page/ (with a trailing slash) might both load the same content.
    • Printer-friendly versions: Some sites create separate pages for printer-friendly versions of articles.
    • Session IDs: E-commerce sites often use session IDs in URLs, which can create multiple versions of the same page.

    How to Fix Duplicate Content

    1. Use Canonical Tags: A canonical tag tells search engines which version of a page is the “main” one. For example, if you have two similar pages, you can add <link rel="canonical" href="https://www.example.com/main-page/" /> to the duplicate page to point to the original.
    2. Set Up 301 Redirects: If you’ve moved a page or consolidated content, use a 301 redirect to send users and search engines to the new URL.
    3. Consolidate Similar Pages: If you have multiple pages with overlapping content, consider merging them into one comprehensive page.

    A Real-Life Example:
    I once worked with a client who had two nearly identical blog posts about “Beginner Yoga Tips.” One was on www.example.com/yoga-tips and the other on www.example.com/blog/yoga-tips. We used a canonical tag to point to the first URL and redirected the second one. Within a few weeks, the original page started ranking higher in search results.


    4. Create a Logical Internal Linking Structure

    Why Internal Links Matter

    Internal links are the connections between pages on your site. They help users navigate your content and give search engines a roadmap of your site’s structure. A well-thought-out internal linking strategy can boost your SEO by spreading “link equity” (the value passed through links) across your site.

    How to Build a Strong Internal Linking Structure

    • Link to related content: If you’re writing about “How to Train a Puppy,” link to your other posts like “Best Dog Food for Puppies” or “House Training Tips.”
    • Use descriptive anchor text: Instead of “Click here,” use phrases like “Learn more about puppy training” to give context.
    • Create a hub-and-spoke model: Designate key pages as “hubs” (e.g., your homepage or category pages) and link to related “spoke” pages (e.g., individual blog posts or product pages).

    5. Optimize Your Navigation Menu

    Why Navigation Matters

    Your navigation menu is like the table of contents for your site. A clear, intuitive menu helps users find what they’re looking for quickly, which improves their experience and keeps them on your site longer.

    Tips for Optimizing Navigation

    • Keep it simple: Limit your main menu to 5-7 items. Use dropdowns for subcategories if needed.
    • Use clear labels: Avoid jargon or clever names that might confuse users. For example, “Shop” is better than “Explore Our Collection.”
    • Include a search bar: If your site has a lot of content, a search bar can help users find specific pages quickly.

    6. Use Breadcrumbs for Easy Navigation

    What Are Breadcrumbs?

    Breadcrumbs are a secondary navigation tool that shows users their location on your site. For example:
    Home > Blog > Travel > Italy Tips

    Why Breadcrumbs Are Helpful

    • They improve user experience by making it easy to backtrack.
    • They help search engines understand the hierarchy of your site.
    • They often appear in search results, making your listings more appealing.

    Organizing your site for better SEO doesn’t have to be overwhelming. Start with small, manageable changes like cleaning up your URLs and grouping similar pages. Over time, these efforts will add up, making your site more user-friendly and search-engine-friendly.

    Creating Content That Stands Out: The Heart of SEO

    Let’s be honest—creating content can feel overwhelming. Whether you’re writing blog posts, product descriptions, or landing pages, it’s easy to get stuck wondering, “Is this good enough?” 

    The truth is, high-quality content is the backbone of SEO. It’s what keeps people coming back to your site and helps search engines understand what you’re all about.

    But what does “high-quality” really mean? Let’s break it down in a way that’s practical, relatable, and actionable.


    1. Write for Your Audience, Not Just for Google

    When I first started blogging, I made the mistake of writing for search engines instead of people. I stuffed my posts with keywords, hoping to rank higher, but the result was clunky, unnatural writing that no one wanted to read. Sound familiar? Here’s the thing: Google’s algorithms are smarter than ever. They’re designed to reward content that genuinely helps people.

    So, how do you write for your audience? Start by asking yourself:

    • Who is my target audience? Are they beginners, experts, or somewhere in between?
    • What problems are they trying to solve? Your content should provide answers, solutions, or inspiration.
    • What tone resonates with them? A friendly, conversational tone often works best, but it depends on your niche.

    For example, if you’re writing a blog post about “how to start a vegetable garden,” don’t just list steps. Share personal stories, like the time you accidentally grew a zucchini the size of a baseball bat. Make it relatable, engaging, and packed with value.


    2. Anticipate Search Terms (But Don’t Overdo It)

    Let’s talk about keywords—those words and phrases people type into Google to find content. While it’s important to include them, the key is to do it naturally. Think of it like seasoning a dish: too little, and it’s bland; too much, and it’s inedible.

    Here’s how to strike the right balance:

    • Do Your Research: Use tools like Google Keyword Planner, Ubersuggest, or even Google’s “People also ask” section to find relevant search terms. For example, if you’re writing about “healthy meal prep,” you might discover related terms like “quick healthy recipes” or “meal prep for beginners.”
    • Think Like Your Audience: What would you search for if you were looking for your content? For instance, someone searching for “best running shoes” might also type in “comfortable running shoes for flat feet” or “durable running shoes for trail running.”
    • Avoid Keyword Stuffing: There was a time when repeating keywords over and over actually worked. Those days are long gone. Now, it just makes your content sound robotic and spammy. Instead, focus on creating a natural flow.

    Pro tip: Don’t forget about long-tail keywords—those longer, more specific phrases. They might have lower search volume, but they often attract more targeted traffic. For example, “how to fix a leaky faucet” is more specific (and easier to rank for) than just “plumbing tips.”


    3. Use Links Wisely (They’re Like Breadcrumbs for Your Readers)

    Links are like the connective tissue of the internet. They help users and search engines discover more content, and they add credibility to your site. But not all links are created equal. Here’s how to use them effectively:

    • Internal Links: These are links to other pages on your own site. They help users navigate your content and keep them engaged longer. For example, if you’re writing a post about “10 Easy Yoga Poses for Beginners,” you could link to another post about “How to Choose the Right Yoga Mat.” It’s a natural way to guide readers to more helpful information.
    • External Links: These are links to other websites. When you link to reputable sources, it shows Google that your content is well-researched and trustworthy. For instance, if you’re writing about the benefits of meditation, you might link to a study from a respected health organization.
    • Use Descriptive Anchor Text: Anchor text is the clickable part of a link. Instead of using generic phrases like “click here,” be specific. For example, “Check out this guide to creating a meditation routine” is much more informative than “Click here.”

    I’ll admit, I used to overlook internal linking. But once I started adding links to related posts, I noticed readers spending more time on my site—and Google seemed to like it too.


    4. Make Your Content Visually Appealing

    Let’s face it: walls of text are intimidating. Even the most well-written content can lose readers if it’s not visually engaging. Here are a few ways to make your content more inviting:

    • Break Up Text with Headings: Use H2 and H3 tags to organize your content into sections. This makes it easier for readers to scan and find what they’re looking for.
    • Add Images and Videos: A relevant image or video can make your content more engaging and help explain complex ideas. Just make sure to optimize them for SEO by using descriptive file names and alt text.
    • Use Bullet Points and Lists: They’re easier to read and help highlight key points. (See what I did there?)

    5. Keep Your Content Fresh and Updated

    One of the biggest mistakes I made early on was treating my blog posts as “one and done.” But the truth is, content needs regular updates to stay relevant. For example, if you wrote a post about “The Best Smartphones of 2021,” it’s probably outdated by now. Updating it with the latest models and features not only helps your readers but also signals to Google that your content is current.


    6. Add a Personal Touch

    People connect with people, not faceless websites. Don’t be afraid to let your personality shine through in your writing. Share personal anecdotes, opinions, or even mistakes you’ve made along the way. For example, if you’re writing about “how to start a podcast,” talk about the time your first episode had terrible audio quality and how you fixed it. It’s these little details that make your content memorable.


    7. Encourage Engagement

    Great content doesn’t just inform—it sparks conversation. End your posts with a question or call-to-action to encourage comments and shares. For example:

    • “What’s your favorite running shoe? Let me know in the comments!”
    • “Did you find this guide helpful? Share it with a friend who’s just starting out.”

    Engagement not only builds a sense of community but also signals to search engines that your content is valuable.


    Content Is King (But Quality Is Queen)

    Creating standout content isn’t about chasing algorithms or gaming the system. It’s about understanding your audience, solving their problems, and delivering value in a way that’s authentic and engaging. When you focus on creating content that resonates with people, the SEO benefits will follow naturally.

    Some Quick SEO Tips You Can Try:

    When someone searches for something on Google, the first thing they see is a list of results with titles, snippets, and sometimes images or videos. This is your chance to make a great first impression. Think of it like a storefront window—you want it to be inviting, clear, and compelling enough for people to step inside. Here’s how to make your site stand out in search results:


    1. Optimize Titles and Meta Descriptions

    Your title tag and meta description are like the headline and elevator pitch for your page. They’re the first things users see in search results, so they need to grab attention and clearly explain what your page is about.

    Tips for Writing Great Titles:

    • Keep it concise: Aim for 50-60 characters to avoid getting cut off in search results.
    • Include your primary keyword: This helps Google understand what your page is about and makes it more relevant to searchers.
    • Make it compelling: Use action words or questions to spark curiosity. For example, instead of “How to Bake Bread,” try “10 Easy Steps to Bake Perfect Bread at Home.”

    Tips for Writing Meta Descriptions:

    • Summarize the page: In 150-160 characters, explain what users will find on your page.
    • Include a call-to-action: Encourage users to click with phrases like “Learn more,” “Discover how,” or “Get started today.”
    • Add keywords naturally: This helps with relevance, but don’t force it—readability comes first.

    I remember spending hours tweaking the title and meta description for one of my blog posts. At first, I tried to stuff in as many keywords as possible, but it sounded robotic. When I rewrote it to sound more human and engaging, my click-through rate improved significantly. It’s a small change, but it makes a big difference.


    2. Optimize Images and Videos

    Visual content is a huge part of what makes your site engaging, but it’s also an opportunity to boost your SEO. Here’s how to make the most of it:

    For Images:

    • Use high-quality visuals: Blurry or pixelated images can make your site look unprofessional.
    • Add descriptive alt text: Alt text helps search engines understand what your image is about. For example, instead of “img123.jpg,” use “chocolate-chip-cookies-fresh-from-the-oven.jpg.”
    • Compress file sizes: Large images can slow down your site, which hurts user experience and SEO. Use tools like TinyPNG or Squoosh to reduce file sizes without sacrificing quality.

    For Videos:

    • Embed videos near relevant text: This helps Google understand the context of your video.
    • Use descriptive titles and descriptions: Just like with images, make sure your video titles and descriptions are clear and keyword-rich.
    • Add a transcript: Transcripts make your video content accessible to everyone and give search engines more text to index.

    I once uploaded a tutorial video without adding a title or description. A few weeks later, I realized it wasn’t showing up in search results. After adding a detailed title, description, and transcript, the video started ranking for relevant keywords. It’s a reminder that even small details matter.


    Promoting Your Website

    SEO isn’t just about what happens on your site—it’s also about getting your content in front of the right people. Think of it like throwing a party: you can have the best snacks and music, but if no one knows about it, it won’t be much fun. Here’s how to spread the word:


    1. Social Media

    Social media platforms like Facebook, Twitter, LinkedIn, and Instagram are great places to share your content and connect with your audience. For example:

    • Share blog posts, videos, or product updates.
    • Engage with your followers by responding to comments and messages.
    • Use hashtags to reach a wider audience.

    I’ve found that posting at the right time can make a big difference. For my blog, I noticed that my audience is most active in the evenings, so I started scheduling posts for that time. The result? More clicks and shares.


    2. Community Engagement

    Joining online communities related to your niche can help you build relationships and drive traffic to your site. For example:

    • Participate in forums like Reddit or Quora by answering questions and sharing your expertise.
    • Comment on blogs or YouTube channels in your industry.
    • Join Facebook groups or LinkedIn communities where your target audience hangs out.

    I once joined a Facebook group for small business owners and shared a blog post I wrote about marketing tips. Not only did it drive traffic to my site, but I also made some valuable connections.


    3. Advertising

    If you’re looking for faster results, consider using paid ads. Platforms like Google Ads, Facebook Ads, and Instagram Ads allow you to target specific audiences and drive traffic to your site. Start with a small budget and test different ad formats to see what works best.


    4. Word of Mouth

    Never underestimate the power of word of mouth. Encourage satisfied users to share your site with others. For example:

    • Add social sharing buttons to your content.
    • Ask for testimonials or reviews.
    • Offer referral incentives, like discounts or freebies.

    Wrapping Up Your Beginner’s Guide to SEO

    It’s important to remember that SEO isn’t about quick fixes or gaming the system—it’s about creating a website that’s both user-friendly and search-engine-friendly.

    From understanding how Google’s crawlers work to optimizing your titles, images, and content, every step you take is about making your site more accessible and appealing to both visitors and search engines.

    It’s a journey that requires patience, persistence, and a willingness to learn. But the payoff—increased visibility, more traffic, and a stronger online presence—will be well worth the effort.

    As you move forward, focus on the basics: create high-quality content that resonates with your audience, organize your site for clarity and efficiency, and promote your content through social media, community engagement, and other channels. Don’t get bogged down by outdated practices or the pressure to be perfect.

    SEO is an ongoing process, and even small, consistent improvements can lead to big results over time. So, take it one step at a time, stay curious, and enjoy the process of watching your website grow and thrive in the digital world.

  • Why is my website not showing on Google? Here’s the steps that you missed.

    Why is my website not showing on Google? Here’s the steps that you missed.

    “Why is my website not showing on Google?” There’s nothing more frustrating than pouring your heart and soul into crafting an article, only to realize it’s not attracting any traffic.

    You search for your targeted keywords, but your content is nowhere to be found. Often, this happens because your page isn’t indexed by Google.

    And before you panic, know this—getting indexed isn’t rocket science. In most cases, it’s just a matter of making sure Google actually knows your site exists.

    In this guide, I’ll walk you through:

    • Why indexing is the silent killer of new websites
    • How Google actually decides what to index (and what to ignore)
    • Step-by-step fixes—no technical jargon, just straight-up actionable steps
    • Common mistakes that keep sites hidden (and how to avoid them)
    • A few ninja tricks to get indexed faster

    Without indexing, your content is essentially invisible on search engines. In this guide, we’ll explore how to get Google to index your site faster using RankMath, a powerful WordPress SEO plugin.

    Stick around till the end for some bonus tips to enhance your indexing success.


    Understanding Google Indexing

    Why Your Site is Ghosting Google

    Before diving into practical steps, it’s essential to grasp the basic concept of how Google indexing works.

    Imagine throwing a party but forgetting to send out invites. That’s essentially what’s happening if your site isn’t indexed.

    Google doesn’t magically know about every new website. It relies on two key processes:

    1. Discovery (Crawling)

    Google continuously searches for new and updated web pages using robots or spiders known as Google bots. These bots either follow links from known pages or use site maps provided by website owners to discover new content. Once a URL is found, the bot crawls the page to analyze its content and layout.

    Google’s bots (called “spiders”) constantly crawl the web, following links from site to site.

    If you check any of the below:

    • No other sites link to yours
    • You haven’t submitted a sitemap
    • Your site is brand new

    …there’s a good chance Google hasn’t found you yet.

    2. Indexing

    After a page is crawled, Google processes it to understand its purpose, meaning, and context. This includes analyzing the title tag, text content, alt attributes, images, and videos. The page is then sorted and ranked based on different search terms. Our focus here is to ensure your content gets indexed, setting the stage for better ranking.

    Once Google discovers your page, it analyzes:

    • Content quality (Is this actually useful?)
    • Technical setup (Can Google read it properly?)
    • Uniqueness (Is this just copied from somewhere else?)

    If everything checks out, your page gets stored in Google’s index—AKA the database that powers search results.

    No index = No rankings. Simple as that.


    Steps to Get Your Pages Indexed

    Force Google to Notice Your Site

    Step 1: Claim Your Spot in Google Search Console

    Think of Google Search Console (GSC) as your backstage pass to Google’s indexing system.

    1. Go to Google Search Console
    2. Add your site (Choose “URL prefix” for simplicity, or simply deciding whether you will use www. or not)
    3. Verify ownership (The HTML file method is easiest for most)

    This is non-negotiable. Without GSC, you’re flying blind.

    Step 2: Submit a Sitemap (Google’s Roadmap to Your Site)

    A sitemap is like handing Google a neatly organized list of all your important pages.

    A sitemap is a file where you provide information about the pages, videos, and other files on your site, and the relationships between them. Search engines like Google read this file to crawl your site more intelligently.

    For WordPress Users (The Easy Way):

    1. Install Rank Math (or Yoast SEO)
    2. Enable XML sitemaps (usually automatic)
    3. Find your sitemap at yoursite.com/sitemap_index.xml
    4. Paste it into GSC > Sitemaps

    For Other Platforms:

    • Squarespace/Wix: yoursite.com/sitemap.xml (auto-generated)
    • Shopify: Use an app like Smart SEO
    • Custom Sites: Generate one with Screaming Frog

    Step 3: Manually Request Indexing (The Fast Pass)

    Manual request means using the URL Inspection Tool

    For individual pages, you can use the URL Inspection tool in Google Search Console to see if a page is indexed and request indexing if it’s not.

    Found a page that’s still MIA?

    • Open Google Search Console
    • Use the URL Inspection Tool
    • Paste the page URL
    • Click “Request Indexing”

    This is like tapping Google on the shoulder and saying, “Hey, check this out.”

    Step 4: Enable Instant Indexing

    For time-sensitive content, such as news articles or live events, instant indexing can be crucial. RankMath and some SEO plugins offers an Instant Indexing plugin for Google that allows you to send URLs directly to Google’s API.

    1. Go to RankMath > Instant Indexing.
    2. Add new URLs or updated URLs and hit “Send to API.”

    Common Indexing Issues

    Why Google Might Be Ignoring You (And How to Fix It)

    Certain settings and content types can prevent your pages from being indexed:

    Mistake #1: You Accidentally Blocked Google

    Check your robots.txt file and meta tags to ensure they’re not blocking Google’s bots.

    If you have an e-commerce site or use filters, you might accidentally create thousands of duplicate URLs. Use your robots.txt file to block unnecessary pages from being crawled.

    Quick Check:

    • robots.txt (Visit yoursite.com/robots.txt—look for Disallow: /)
    • noindex tags (View page source → search for noindex)

    Another Fix:

    • In WordPress, go to Settings > Reading → Uncheck “Discourage search engines”
    • In Rank Math/Yoast, ensure pages aren’t set to noindex

    Mistake #2: Your Site Has Zero Backlinks

    Google discovers most new sites through links. No links = Harder to get crawled.

    Quick Fixes:

    • Share on social media (even just Twitter helps)
    • Submit to niche directories (like Blogarama for blogs)
    • Comment on relevant forums (with legit, useful responses)

    Mistake #3: Thin or Duplicate Content

    If your site has multiple pages with similar content, Google might struggle to decide which one to index. Fix this by using canonical tags (Rank Math can help with this) or consolidating similar pages.

    Google won’t waste time indexing:

    • Pages under 300 words
    • Copied product descriptions
    • “Coming soon” placeholders

    Solution:

    • Combine weak pages into stronger ones
    • Use canonical tags for similar content
    • Add original insights (even to product pages)

    Tips for Better Indexing

    Internal Linking

    Leverage internal links from indexed pages to new content. This helps search engines discover your new pages faster.

    Got an old post that’s already indexed? Link to your new page from it. Google crawls known pages frequently, so this acts like a bat signal.

    Produce High-Quality Content

    Always create unique, valuable content that directly answers specific queries. This increases the likelihood of your content being deemed worthy of indexing.

    Manage Crawler Traps

    For e-commerce sites, avoid creating too many filter-generated URLs, which can confuse search engines. Use your robots.txt file to block unnecessary pages from being crawled.

    Avoid Overloading Your Site: Too many low-quality or thin pages can slow down indexing. Focus on creating fewer, high-quality pages instead.

    The Social Trigger

    Posting on Twitter/LinkedIn with a link? Google’s crawlers monitor social signals. It’s not a ranking factor, but it can speed up discovery.

    Final Reality Check

    Getting indexed is Step Zero of SEO. If you skip this, nothing else matters.

    Today’s Action Plan:

    1. Sign up for Google Search Console (10 minutes)
    2. Submit your sitemap (5 minutes)
    3. Inspect your top 3 pages (3 minutes)

    That’s it. No fancy tools required—just making sure Google knows you exist.

    Question for you: Have you checked your robots.txt file lately? (Most people haven’t—and it’s costing them traffic.) Drop a comment if you want me to break it down further

    Other WordPress Plugins You Can Use

    While Rank Math is my top recommendation, there are other excellent plugins you can use:

    1. Yoast SEO

    Yoast SEO is another powerhouse plugin that makes sitemap creation easy. Here’s how to use it:

    1. Install and activate Yoast SEO from the WordPress plugin directory.
    2. Go to SEO > General in your dashboard.
    3. Click the Features tab and make sure the XML sitemap toggle is enabled.
    4. Your sitemap will be automatically generated and available at https://yourwebsite.com/sitemap_index.xml.
    5. Submit it to Google Search Console using the same steps as above.

    2. All in One SEO (AIOSEO)

    AIOSEO is another user-friendly option:

    1. Install and activate the plugin.
    2. Go to All in One SEO > Sitemaps in your dashboard.
    3. Enable the sitemap feature if it’s not already on.
    4. Your sitemap will be available at https://yourwebsite.com/sitemap.xml.
    5. Submit it to Google Search Console.

    When Using other CMS

    Below is a quick overview on how to generate sitemap for when you’re using other content management systems for your websites:

     Generating and Submitting a Sitemap on Squarespace

    Squarespace also automatically generates a sitemap for your site. Here’s how to access and submit it:

    Step 1: Find Your Sitemap URL

    1. Log in to your Squarespace account and go to your site’s dashboard.
    2. Squarespace automatically generates a sitemap. Your sitemap URL will look like this: https://yourwebsite.com/sitemap.xml.

    Step 2: Submit Your Sitemap to Google

    1. Go to Google Search Console.
    2. Select your website property.
    3. Navigate to Sitemaps in the left-hand menu.
    4. Enter sitemap.xml in the field and click Submit.

    Squarespace takes care of updating your sitemap whenever you add or remove pages.

    Generating and Submitting a Sitemap on Wix

    Wix makes it super easy to generate and submit a sitemap—it’s all done automatically! Here’s how to access and submit it:

    Step 1: Find Your Sitemap URL

    1. Log in to your Wix account and go to your site’s dashboard.
    2. Wix automatically generates a sitemap for you. Your sitemap URL will look like this: https://yourwebsite.com/sitemap.xml.

    Step 2: Submit Your Sitemap to Google

    1. Go to Google Search Console.
    2. Select your website property.
    3. Navigate to Sitemaps in the left-hand menu.
    4. Enter sitemap.xml in the field and click Submit.

    Wrapping Up

    Why is My Website Not Showing on Google?

    If your website isn’t showing up on Google, it’s likely because it’s not indexed.

    Indexing involves two main phases: discovery and processing of your pages. To ensure your site gets indexed, you should submit your sitemap via Google Search Console using a plugin like RankMath (when using WordPress), utilize the URL Inspection tool for individual pages, and enable instant indexing for time-sensitive content.

    Avoid common pitfalls such as duplicate content and improper use of robots.txt or meta tags and regularly monitor your indexing status and ensure your site’s settings are optimized for search engines.

    Why not take a few minutes today to set up Rank Math, submit your sitemap, and make sure your site is ready to be discovered. Your future visitors (and your traffic stats) will thank you!


    Read more case studies or articles about on-page SEO and technical SEO. You can also check out my available services:

  • Configuring HSTS and Upgrade Insecure Requests in Magento 2 | How to Set Global Redirects for Magento

    Configuring HSTS and Upgrade Insecure Requests in Magento 2 | How to Set Global Redirects for Magento

    The first thing you need when creating a website aside from the choice of CMS and hosting is the SSL which can be simply explained as getting a certificate to show that your website is secured (or more technically, makes your website from http:// to https://).

    This is important because unsecured websites may find it hard to rank and Google and other search engines may show notifications that your website is unsecured which may prevent users on actually going into your website even if they have clicked the link to your content.

    But first you need to decide on whether you’ll use a www. version or a non-www. version because you’ll need it in the future when you set up your console and for this Global redirect setup.

    When you’re done deciding, you can continue setting up your Magento website by following the steps below.

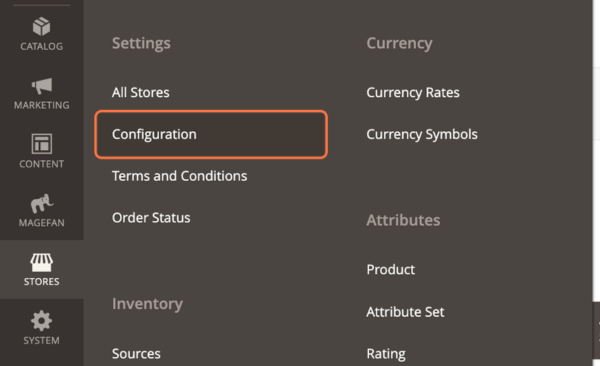
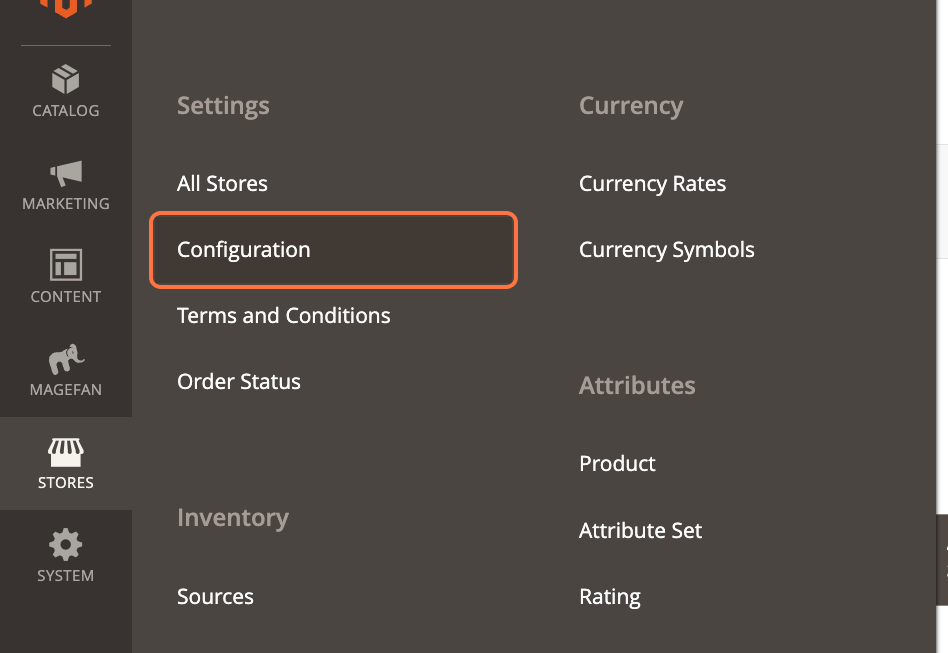
    Click on STORES > Configuration

    Click on Web (under General) > Base URLs (Secure)

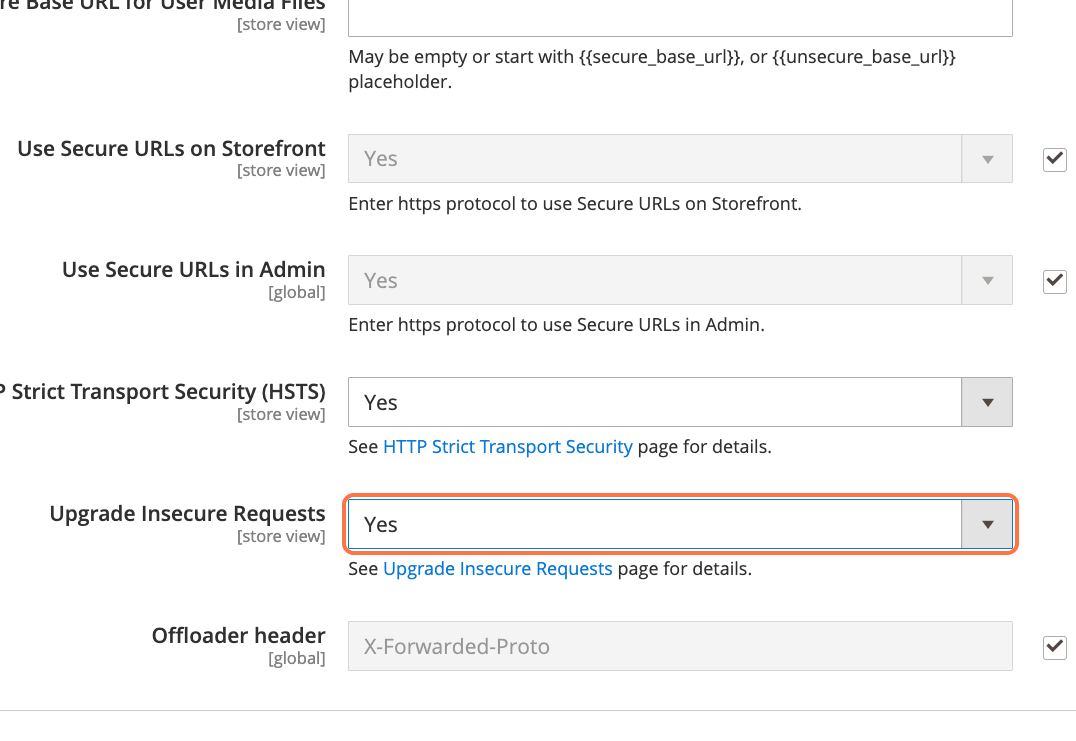
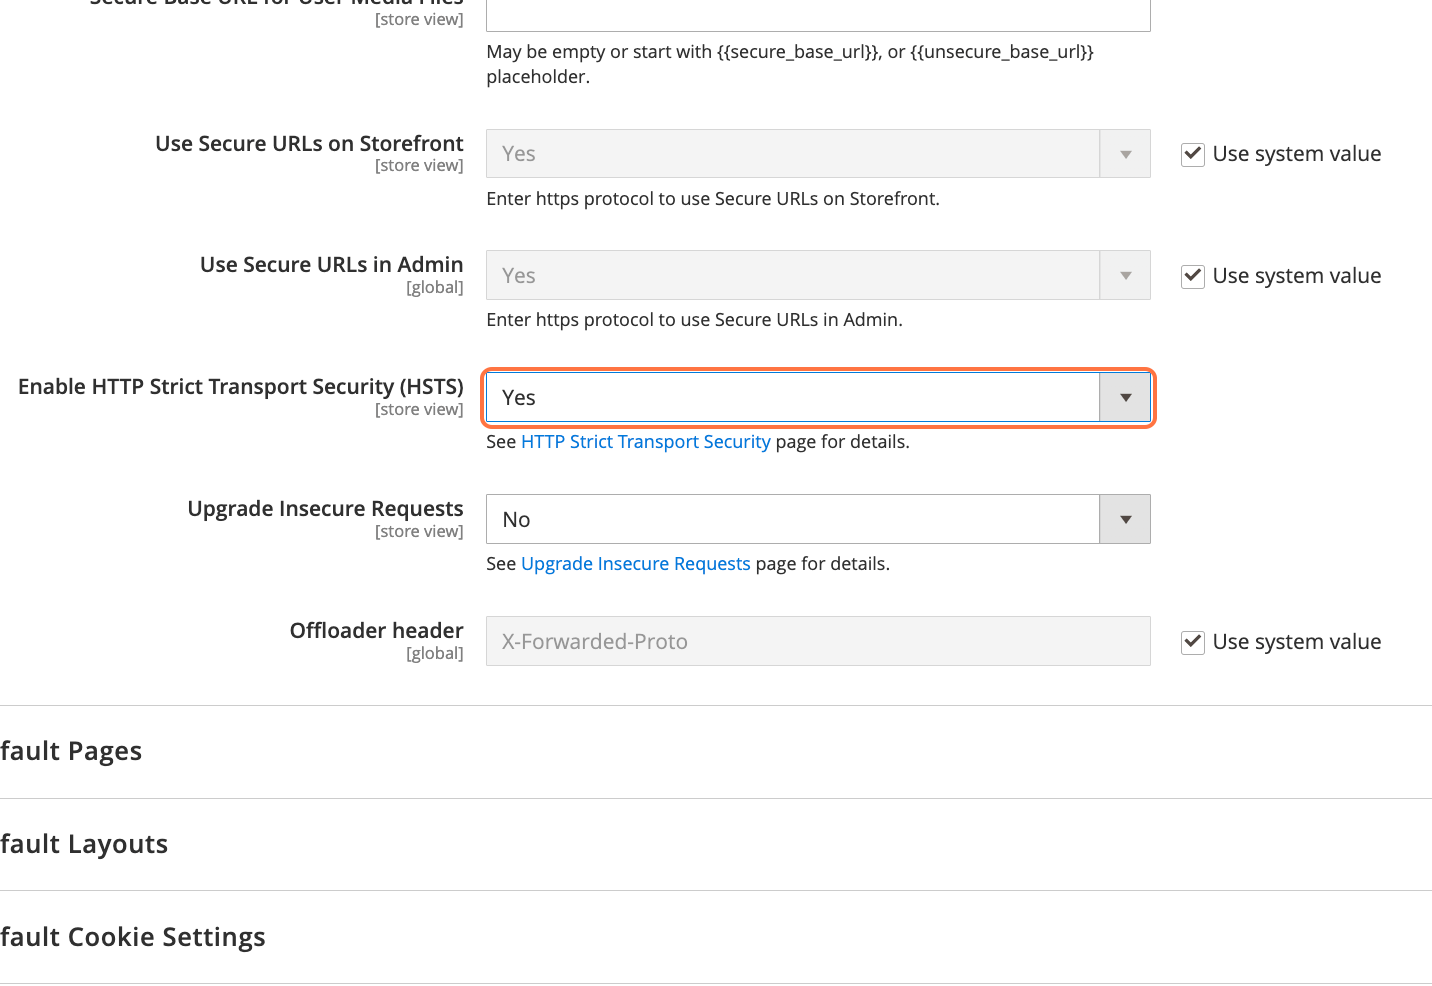
    Upgrade Insecure Requests is a security feature of Magento which means that users cannot access the HTTP version anytime (helps prevent hacking) and is also a great prevention so that Google won’t crawl and index the http:// content in case you have downtime when adding a new SSL.

    Select Yes from Enable HTTP Strict Transport Security (HSTS)

    Now when you set this to YES you NEED to note down when the website’s SSL will expire.

    When you set “Enable HTTP Strict Transport Security (HSTS)” settings to Yes this means that you would always need an SSL for your website to be accessible to users.

    If website loses SSL, then users cannot access it. This is good for SEO too since it basically signals that the Magento website prioritizes secure access, and can prevent http:// requests on your Google Search Console (which can lead to duplicate content when http version is indexed).

    Select Yes from Upgrade Insecure Requests

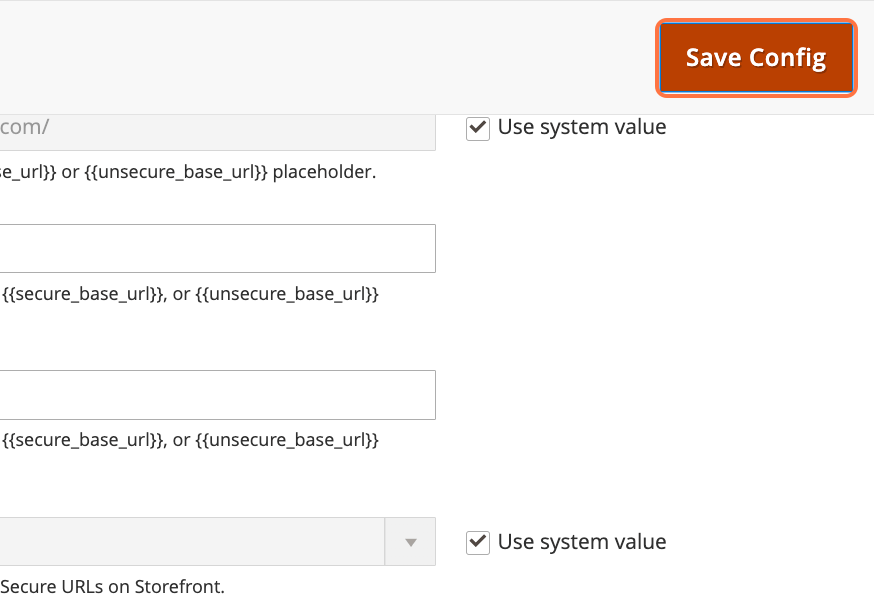
    When done, click on Save Config.

    Global Redirects and configuring HSTS (HTTP Strict Transport Security) and Upgrade Insecure Requests are crucial steps in setting up a Magento 2 ecommerce website for several reasons:

    1. Enhanced Security: Configuring HSTS ensures that your website is accessed only through secure HTTPS connections. This prevents unauthorized access, data breaches, and interception of sensitive information exchanged between the user and the website.
    2. SEO Benefits: Search engines like Google prioritize secure websites over unsecured ones. By implementing HSTS, you signal to search engines that your website prioritizes security, potentially improving your search rankings and visibility.
    3. User Trust: With HSTS enabled, visitors to your website can trust that their data is encrypted and secure. This builds trust and credibility, leading to higher user engagement and conversions.
    4. Prevention of Duplicate Content: Enabling HSTS and Upgrade Insecure Requests helps prevent the indexing of HTTP versions of your website’s pages. This prevents duplicate content issues, which can negatively impact SEO rankings.
    5. Protection Against Hacking: Upgrade Insecure Requests ensures that users cannot access the insecure HTTP version of your website, reducing the risk of hacking and unauthorized access to sensitive data.
  • Yes it’s possible to create Google Ads Account For Free Without Credit Card and Campaign! Here’s How

    Yes it’s possible to create Google Ads Account For Free Without Credit Card and Campaign! Here’s How


    You’re here because you’ve tried creating a google ads account before but you were overwhelmed with the campaign creation and disheartened that signing up needs a credit card… but truth is you can explore Google Ads without going all through that!

    If you’re a small business or an individual that is looking forward to implementing and learning about Google ads account and you’re trying to see if you can learn to navigate it on your own first before hiring, then here’s the easy step by step guide for you.

    1. Go to Google Ads

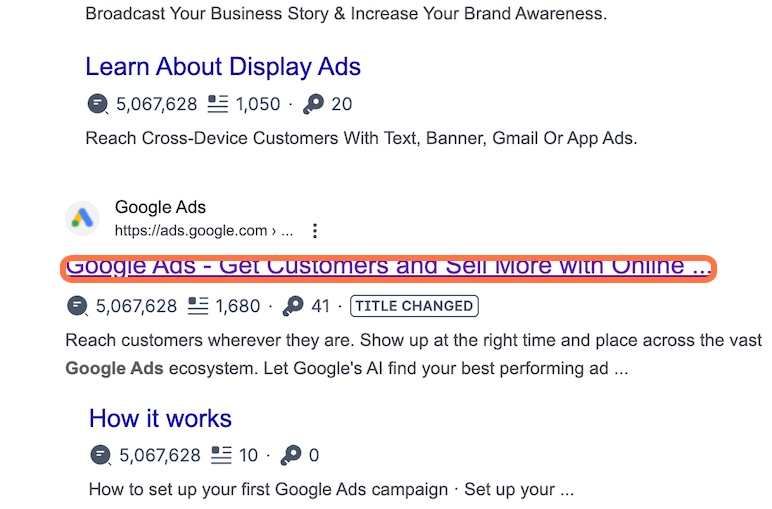
    Make sure to go to “ads.google.com” to create your ads accounts.

    2. Click on Start now

    If you’re curious about the whole Google Ads, if you have the budget to run an ads campaign with an expert go with the “Start with an Expert” but for everything else, click on Start now.

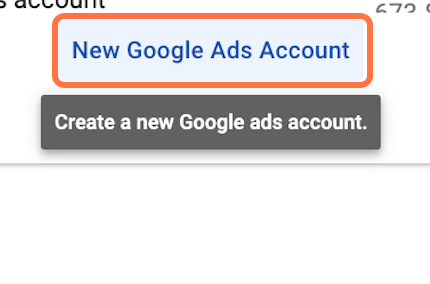
    3. Click on “New Google Ads Account

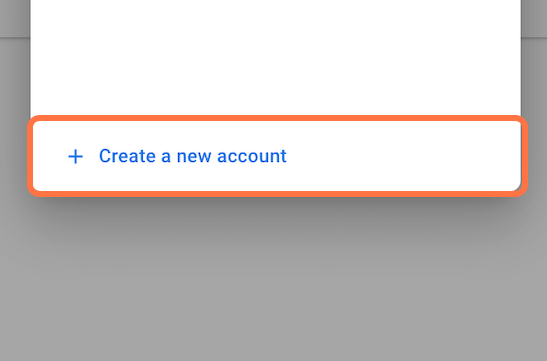
    If you have existing Google Ads account you may find them above the button. Make sure to click Create a new account shown below:

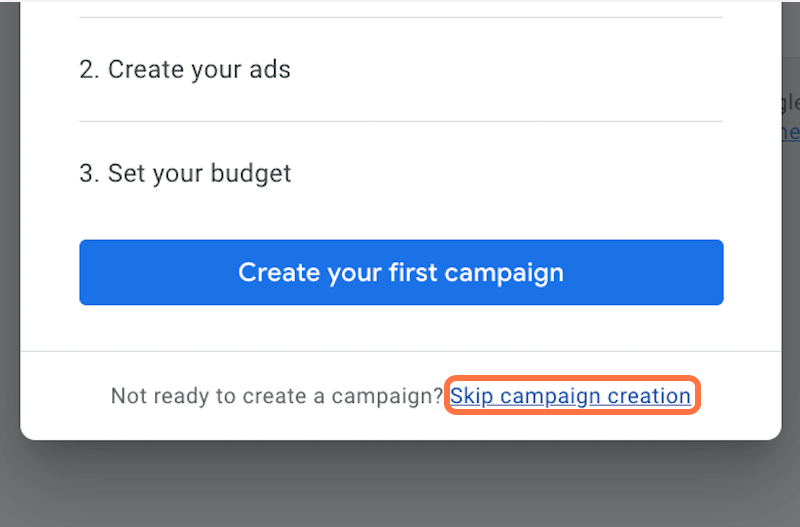
    4. The secret to create Google Ads Account For Free Without Credit Card and Campaign.

    You have to click “Skip campaign creation” so you wouldn’t need to set up an ad or put up your credit card to create your google ad account.

    The secret to create Google Ads Account For Free Without Credit Card and Campaign.

    5. Click on Submit

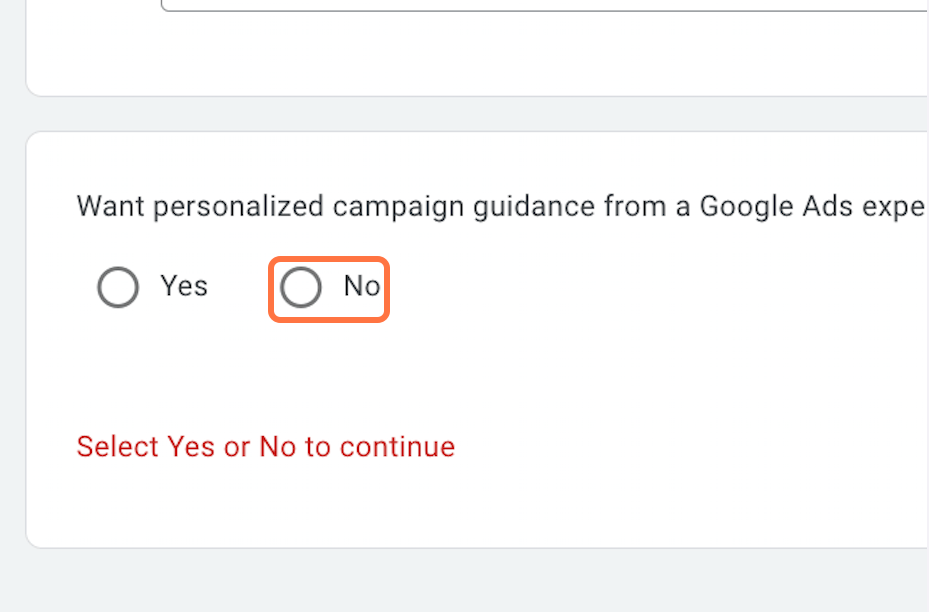
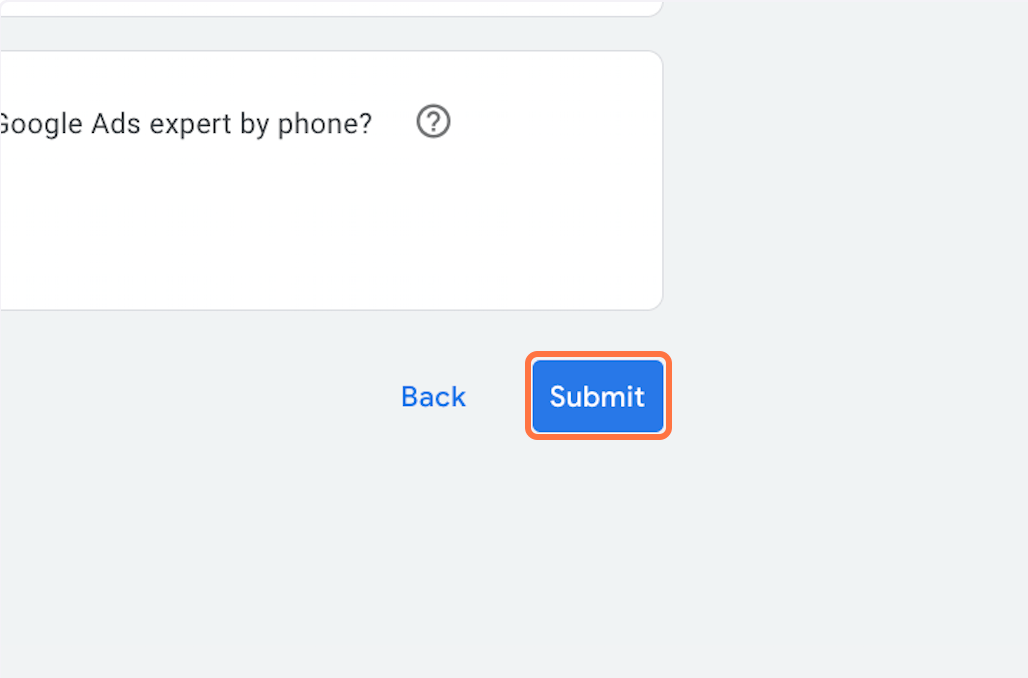
    You can choose to set up a campaign with a guide from a Google Ads expert though your phone but you can always learn to navigate things first by clicking on the No and then clicking “Submit”.

    Clicking on submit to create google account
    image 11 edited

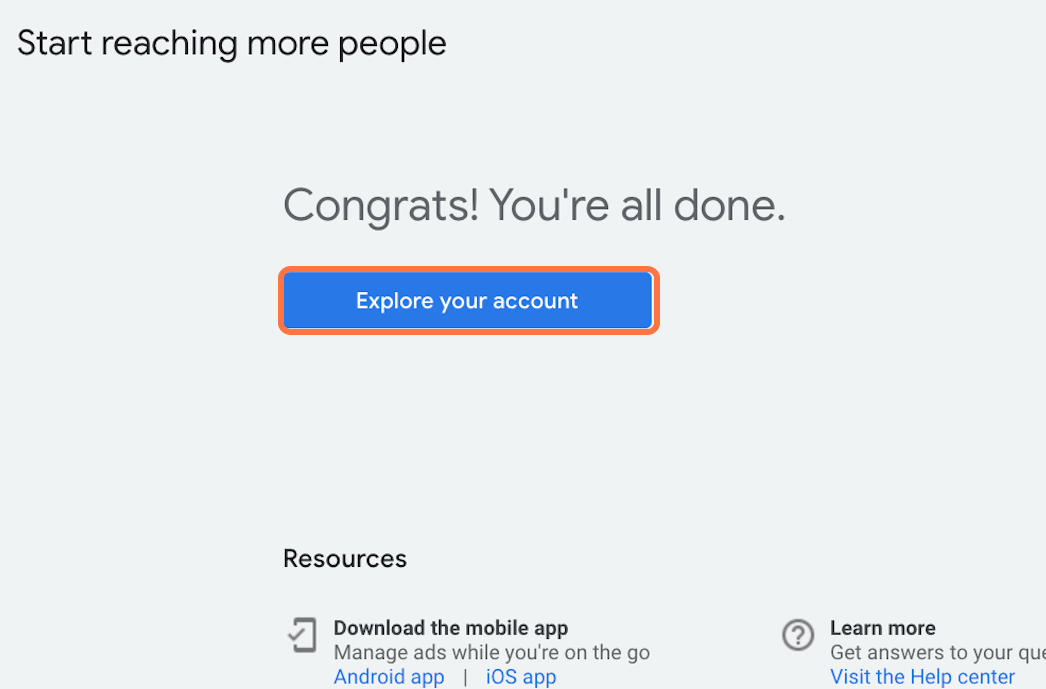
    6. Click on Explore your account

    I wrote a few articles that shows how you can use your Google Ads account for keyword research and SEO optimization. Check them out below!

    Yes it's possible to create Google Ads Account For Free Without Credit Card and Campaign! Here's How article's Featured image

    Check out all the other DIY SEO Tips here >>

    Related Reads

    Read more case studies or articles about on-page SEO and technical SEO. You can also check out my available services:

  • Configuring Base URL Redirects, and Web Server Rewrites

    Configuring Base URL Redirects, and Web Server Rewrites

    Configuring base URL redirects and web server rewrites in Magento 2 is important for maintaining a clean URL structure, avoiding duplicate content issues, preserving link authority, and improving the performance of your online store.

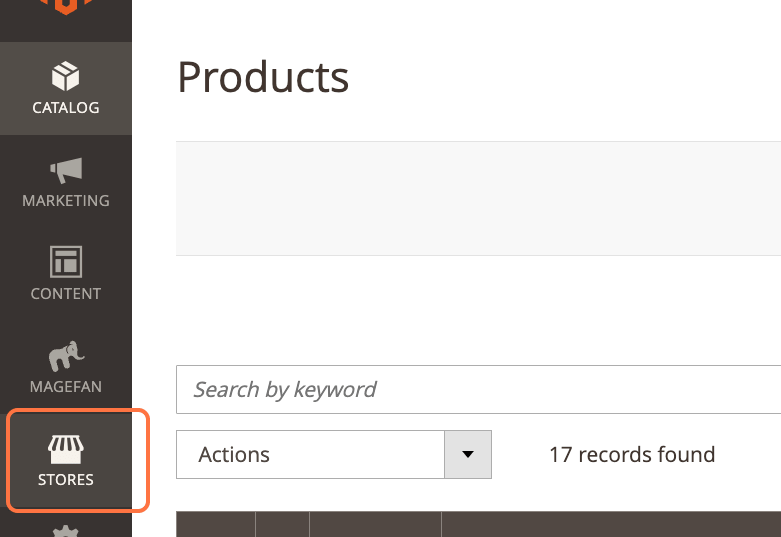
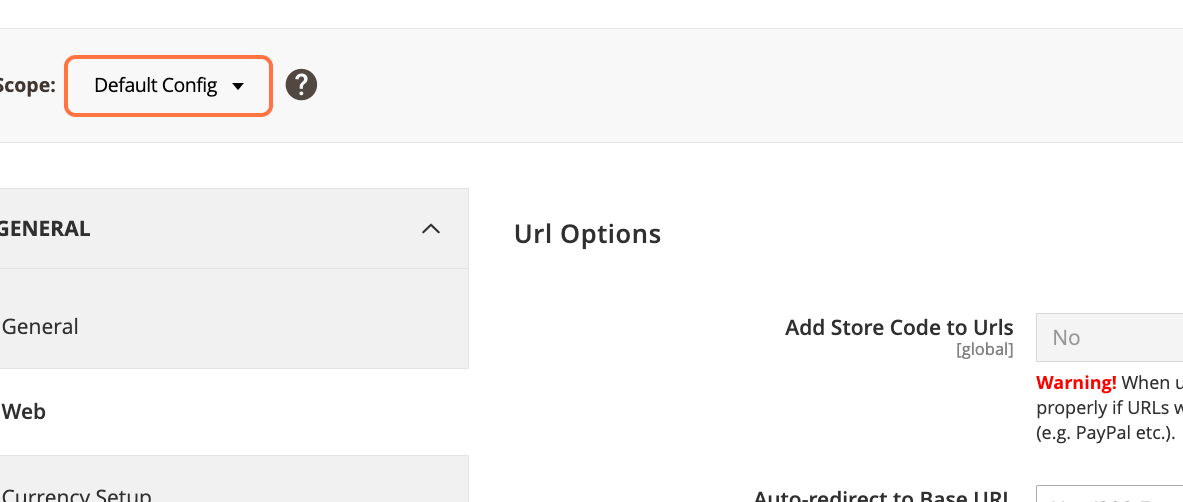
    Click on STORES >> Configuration

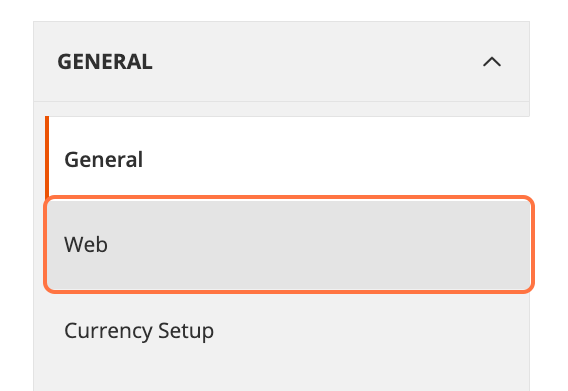
    Go to Web (Under General)

    image 9 edited 2

    Make sure “Add Store Code to URLs” is set to NO.

    This ensures that URLs are descriptive and easy to read and doesn’t contain unneeded characters about your store.

    By setting “Add Store Code to URLs” to NO, you ensure that your store’s URLs are clear, descriptive, and easy to read. This not only enhances the user experience but also makes your website more search engine-friendly.

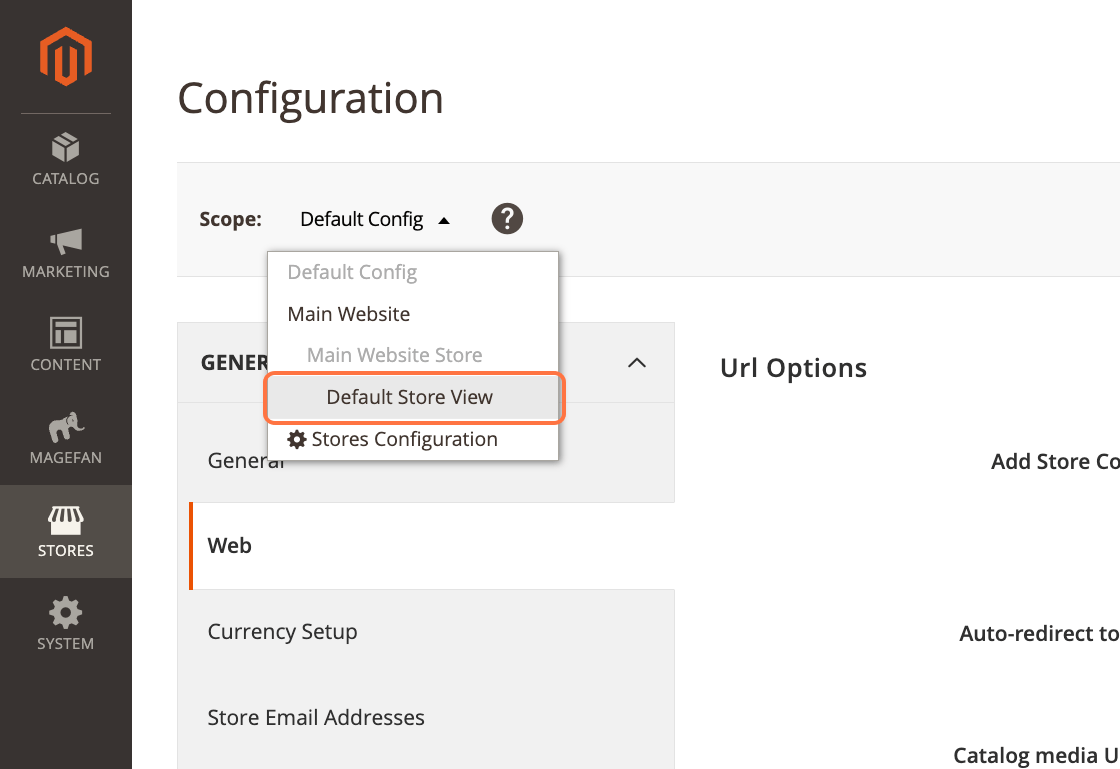
    Don’t change it when it’s already set to no, then click on the Default Config in the upper left corner.

    Click on Default Store View >> OK

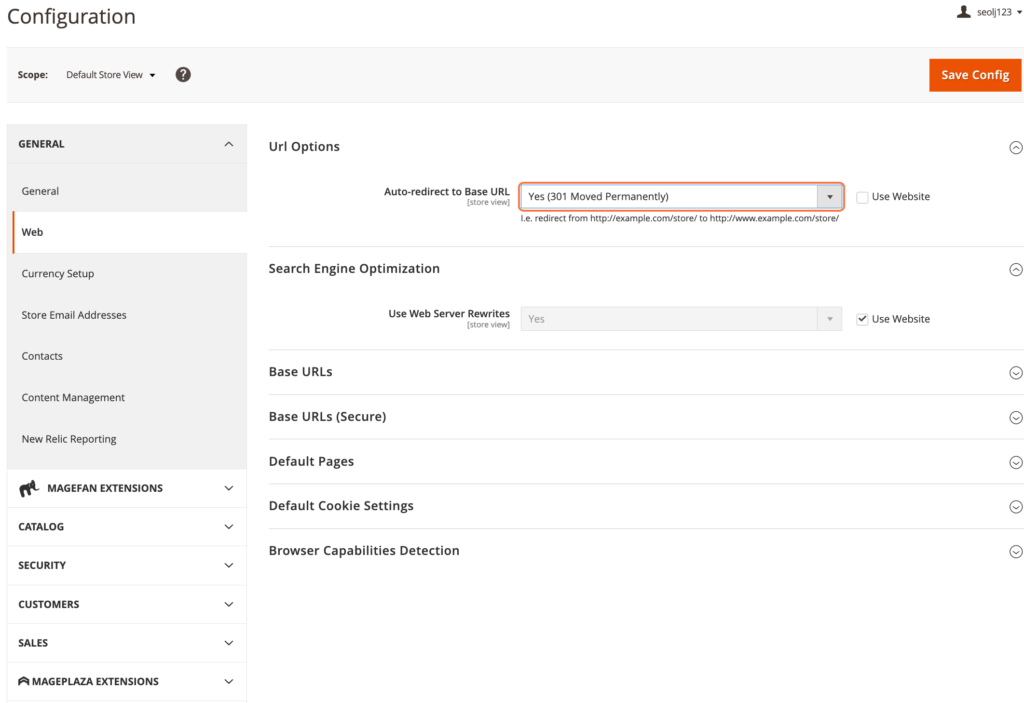
    Uncheck the “Use Website” option to change the field then Select Yes

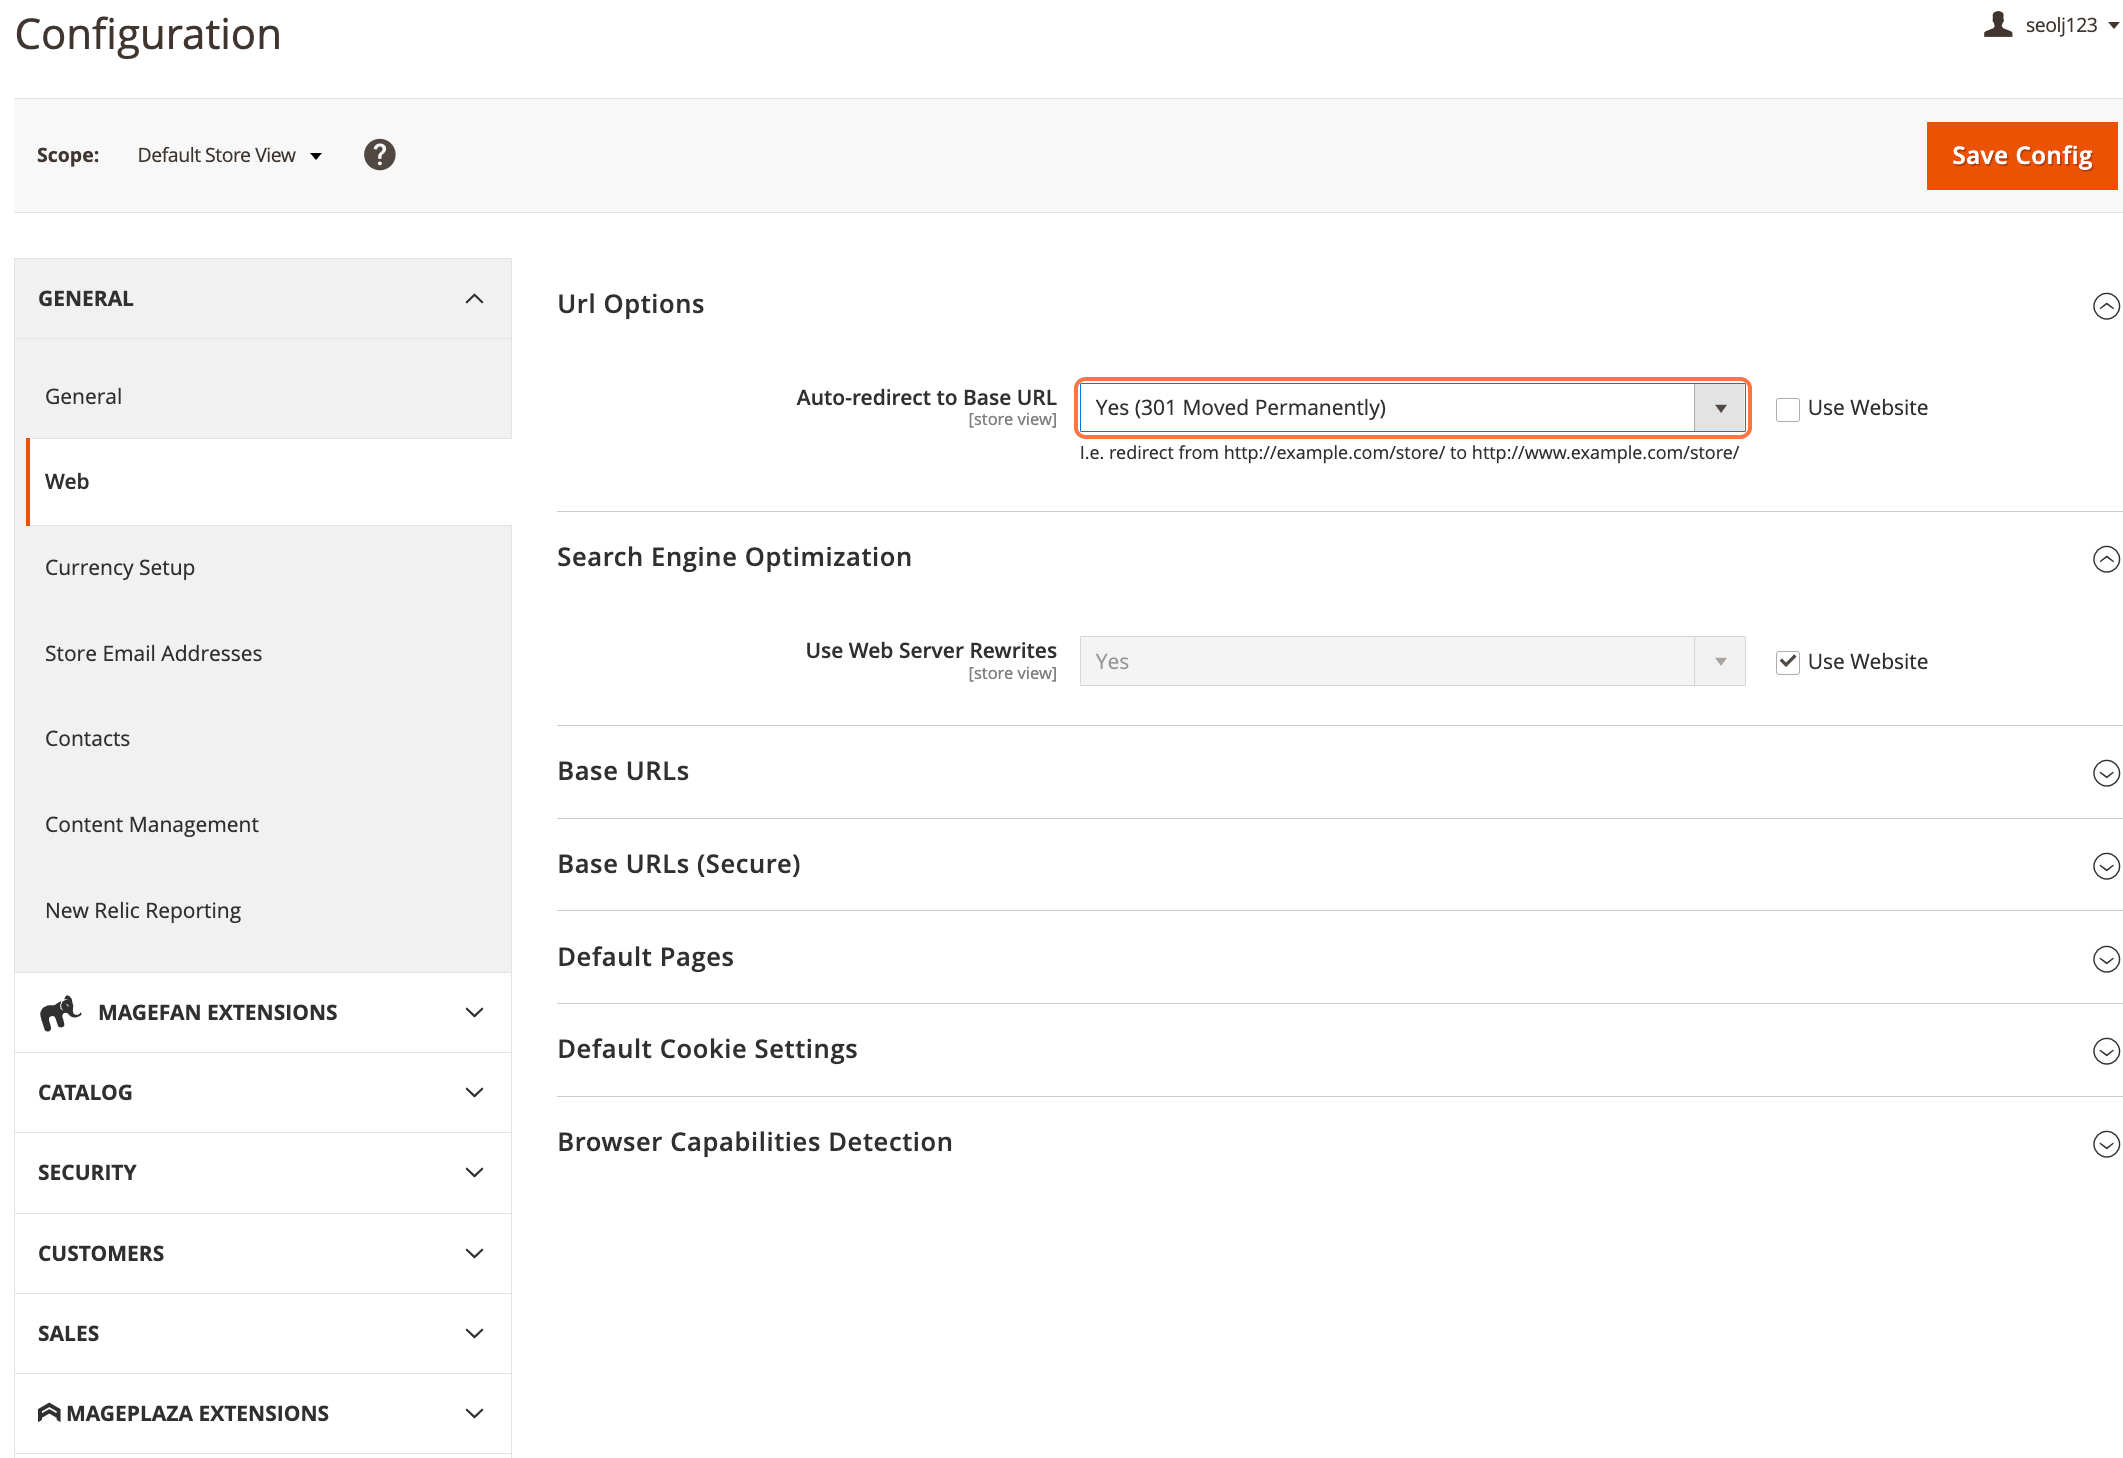
    On the field Auto-redirect to Base URL uncheck Use system value then set it to Yes (301 Moved Permanently) to make sure that link authority is passed whenever there are redirects. While this has been a long debate on whether 302 links still pass authority, 301s are best used.

    Modifying the “Auto-redirect to Base URL” to “Yes (301 Moved Permanently)” is important for maintaining link authority during redirects. This is crucial for search engine optimization (SEO) as it ensures that when a URL is redirected, the link authority is passed correctly, contributing to better search rankings.

    Select Yes from “Use Web Server Rewrites” if it’s set to No

    You can see from the image above that the the “Use Web Server Rewrites” is already set to yes. But what does it actually do?

    Web server rewrites can improve the performance of your Magento 2 store by allowing the web server to serve rewritten URLs directly without the need for additional processing. This can result in faster page load times and a better overall user experience.

    This option allows Magento to leverage web server rewrites (e.g., Apache’s mod_rewrite) for handling URLs, resulting in faster page loads and a more efficient user experience.

    When done, make sure to “Save Config”

    These configurations help create a streamlined and SEO-friendly structure for your Magento 2 store. Clean URLs contribute to a positive user experience, while proper redirection and web server rewrites enhance search engine rankings and overall site performance. It’s essential to make these adjustments to ensure that your online store is both user-friendly and optimized for search engines.

    Check out all the other DIY SEO Tips here >>


    Related Reads

    Read more case studies or articles about on-page SEO and technical SEO. You can also check out my available services: